Right to
Know Website
Agency
Users Manual
Version 1.2
1 July 2008

1 Accessing
the Right to Know Website
1.3 Getting your Temporary
Password
1.5 How to Change your
Password
1.6 Agency User Forgets
Password
2.1 The Agency User
Control Panel
3 Upload
Contract (Add Contracts to the System)
3.1.1 Upload Document Summary
Data
3.1.4 Adding Contracting Party
3.1.5 Redacted Document
Statement
4.2 Contract Search
Functionality
4.4 Amendment or PO Upload
Procedures
4.4.1 Accessing the Upload
page
4.4.2 Amendment or PO document
Upload
4.5 Contract Upload for
Previously FTP’d Summary Data
4.6 Upload of Redacted
Document Version
1 Accessing the Right to Know Website
1.1 Initial Access
The Treasury Right to
Know website is accessed through the left navigation bar of the current
patreasury.gov site (fig. 1). Under the
title bar “PA Contracts” there are two options:
- Search for Public Contracts
- Agency Log In
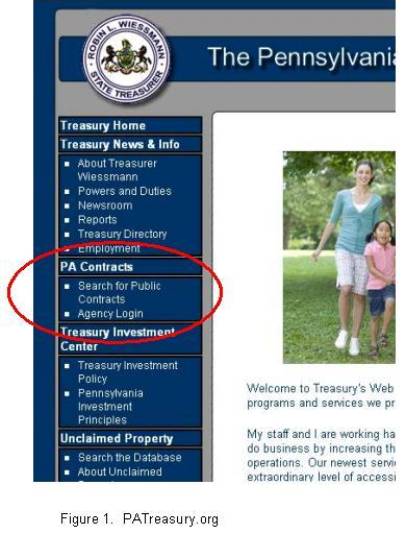
Clicking on the “Search for Public Contracts” link takes the public user to a search contracts page. There are no login requirements for the public.
Clicking on the “Agency Login” link will take agency users to the log in page, from which they can log in and access agency functions.
1.2 Assignment of User IDs
To simplify the access process, Treasury has decided to match Agency User IDs to the Agency user’s e-mail address. Treasury has reached out to all applicable entities to gather a listing of agency users and Right to Know officers. These agency users will be added en masse to the system database. To add, modify, or delete agency users after the initial system rollout, agency Right to Know officers must forward the First and Last Name, e-mail address, and office phone number to the Treasury Bureau of Contracts and Public Records, e-mail contractinfo@patreasury.gov.
1.3 Getting your Temporary Password
As agency users are added to the system, temporary passwords
will be e-mailed to each user to allow initial system access. Each password forwarded is a unique, secure,
system-generated password which the agency user may copy and paste into the
password textbox of the login page. The
initial log on by the agency user will generate a required password reset. This process will be explained in detail in
the next section of this document, First
Time Login.
1.4 First Time Login
Clicking the “Agency
Login” link will bring up the following (fig. 2):
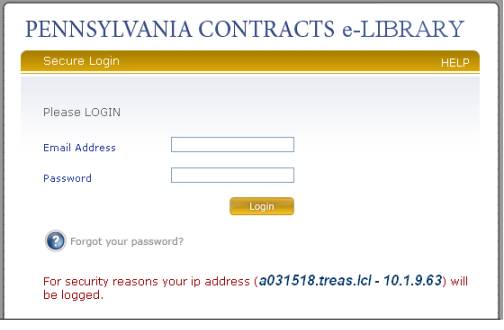
Figure
2. Agency Login Page
As you can see, the User
ID is defined as the user e-mail address.
The user should type his/her e-mail address into the “Email Address”
textbox. The user may then paste or type
the assigned temporary password into the password textbox. Clicking the “Login” button will initiate
the login process. The functionality of
the “Forgot your password?” link will be discussed later in this manual.
The initial login to the
system will automatically generate a “Change Password” page as shown (fig. 3):
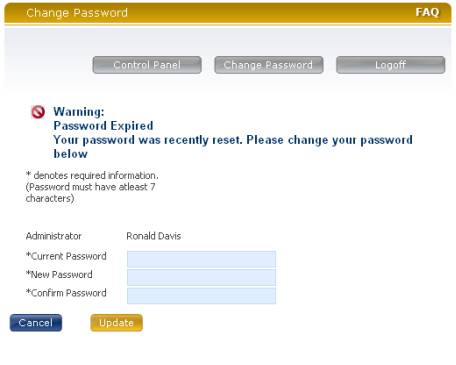
Figure 3: Change Password Page
As with any password change page, this system requires that the agency user input the currently active password into the “Current Password” box prior to entering a new password into the “New Password” textbox. The password entered must be a minimum of seven characters. The agency user must then reenter the new password into the “Confirm Password”, and click “Update”. The system will propagate a “Success! Password changed” message automatically, and the agency user’s password will be reset. All subsequent agency user logins will bypass the “Change Password” page, and take the agency user directly to the control panel page.
1.5 How to Change your Password
The “Change Password”
link is accessible from all agency users’ pages. The function of this page will be discussed under “Control
Panel”.
1.6 Agency User Forgets Password
If an agency user forgets
his/her password, a link exists on the login page titled “Forgot your
Password?” Clicking on this link will
take the agency user to a page that requires inputting an e-mail address to
recover the agency user’s password, as shown in figure 4 below:
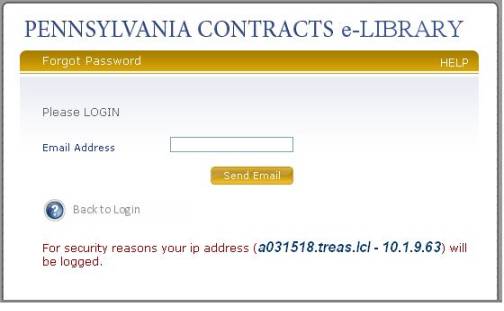
Figure
4. Forgot Password Page
The agency user should
type in his/her user id (e-mail address) in the Email textbox. Clicking the “Send Email” button will send
an e-mail with a temporary password for the agency user, which must be reset on
initial login.
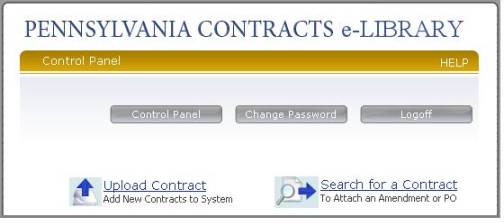
Figure 5. Control Panel
2 Control Panel Functionality
2.1 The Agency User Control Panel
The agency user Control
Panel is shown in figure 5 below, and provides links to the “Upload Contract”
(Add New Contracts to the System), and “Search for a Contract” (To Attach an
Amendment or PO) pages. Additionally,
links to the “Change Password” page and “Logoff” functionality are
present. This page is the gateway to
virtually all agency user interaction with the system.
Figure
5. Control Panel
2.1.1 Change Password
The “Change Password”
link is present on all of the agency user pages. When clicked, it brings up the page shown below (fig. 6):
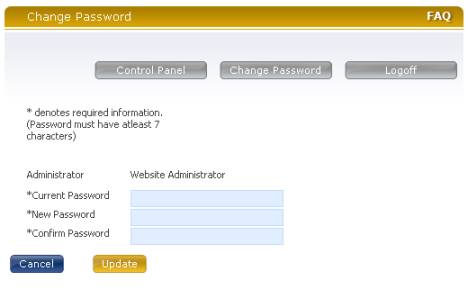
Figure 6: Change Password
This page functions
similarly to the initial logon password reset.
2.1.2 Logoff Button
Clicking on the “Logoff”
button located on all agency users’ pages will log the user out of the system,
and return the user to the logon page.
2.1.3 Upload Contract
The “Upload Contract”
icon is used to upload new contracts to the Treasury file system. Clicking on this link will take the agency
user to the contract summary page.
A detailed explanation of
the “Upload Contract” function is contained in section 5 of this manual.
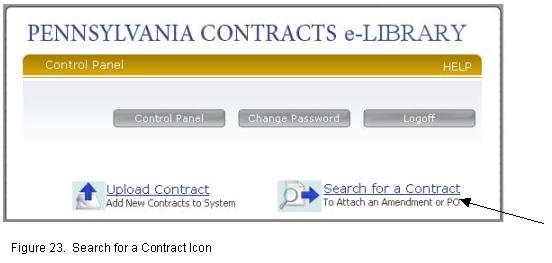
2.1.4 Search for a Contract
Clicking on the “Search
for a Contract” icon on this page will take the agency user to the Contract
Search page. From the Contract Search
page, the agency user may retrieve a contract, to which an amendment or
purchase order may be attached.
A detailed explanation of the “Search for a Contract” function is contained in section 6 of this manual.
3 Upload Contract (Add Contracts to the System)
The manual upload process
is composed of inputting the required document summary data in addition to
uploading the actual contract files.
If the agency is utilizing FTP procedures to automatically preload the
contract summary data, the contract file will be uploaded manually using the
“Search for a Contract” function. These
procedures will be covered under the “Search for a Contract” section.
3.1 Contract Summary Data
To upload a new contract,
the agency user will click on the “Upload Contract” icon on the “Control Panel”
page. This will produce the “Contract
Summary Data” screen, as shown in figure 7 below:
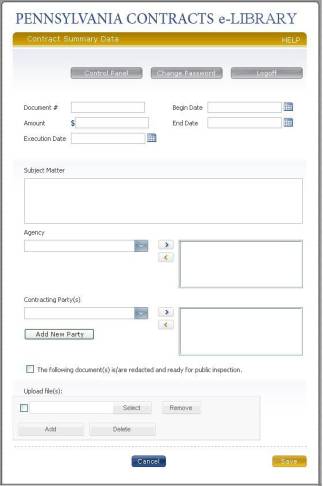
Figure 7: Contract Summary Page
On this screen, the
agency user will input the summary data for all uploaded documents, and attach
the document files. There are eight
summary data elements for upload. The
“Begin Date” and “End Date” entries are the only ones that are not required for
document upload. We will address each
part of this page individually in the following sections.
3.1.1 Upload Document Summary Data
The first section of the upload document summary data is comprised of the entries shown in figure 8:
Figure 8: Initial
Summary Page Entries
The “Contract #” entry
must be a unique contract number for the agency. The amount of the contract should be entered in the “Amount”
box. You may use any format (commas, no
commas); however, if more than one decimal point is input the system will not
accept the upload. The dates may be
input either with the calendar icon functionality or manually; the date textbox
will accept most manually input date formats.
3.1.2 Subject Matter Box
The subject matter box is
a textbox requiring a description of the uploaded document:
Figure 9: Subject
Matter Box
The input to the subject
matter box should use the following example as a guide:
“This agreement requires that the PA Institute for the Blind &
Handicapped, Inc. provide material and labor to perform janitorial and mowing
services for the PA DOT sign shop”.
This subject matter
description will appear in the contract search results table.
3.1.3 Agency Upload
The agency upload box is
shown in figure 10 below:
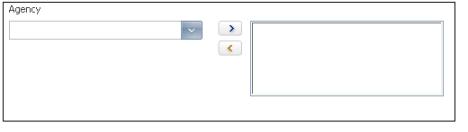
Figure 10: Agency
Dropdown and Collection Box
To upload the agency or
agencies associated with the document, you may use the dropdown box below the
“Agency” label by clicking on the arrow on the right side of the box and
scrolling down to find the appropriate agency, as shown in figure 11:
![]()
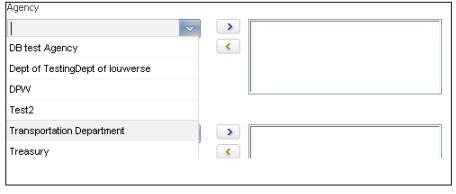
Figure 11: Agency
Dropdown Box
Click on the agency name in the dropdown. The dropdown should disappear, and the selected agency should appear in the Agency dropdown window as shown in figure 12 below:
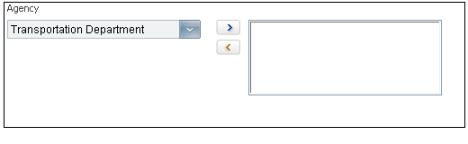
Figure 12: Agency
Name displayed in Window
Finally, to enter the
selected agency in the collection box on the right, click the right arrow
adjacent to the agency name dropdown.
The selected agency should appear in the collection box on the right, as
shown in figure 13:
![]()
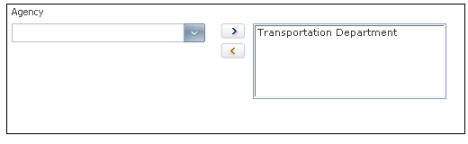
Figure 13. Agency moved to Collection Box
If there is more than one agency associated with the contract, follow the same procedures to add the agency to the collection box. If an incorrect agency is added to the collection box, simply click on the agency name to highlight, and then click on the left arrow to remove the agency from the collection box.
You may also add agencies by typing directly into the window below the agency label. The entry will auto-fill if it is found within the dropdown.
3.1.4 Adding Contracting Party
With one important
exception, the procedure for adding a contracting party to the summary data is
the same as that used for adding an agency.
If the contracting party for the new contract is already present in the
dropdown, the procedures are exactly the same.
However, if the contracting party is not present in the dropdown, the
agency user must add the name to the dropdown list by clicking on the “Add New
Party” button located below the contracting party dropdown, as shown in figure
14:
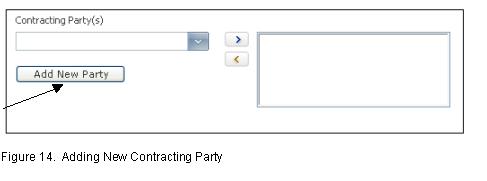
Clicking on this button
will produce the new page shown in figure 15:

Figure
15. Adding New Contracting Party Page
The agency user should
enter the name of the new Contracting Party in the textbox, and click the
“Save” button. This action will return
the user to the summary data page, with the new contracting party name already
present in the collection box. Once
this information is saved, the new contracting party will appear in the
dropdown box. Clicking on the “Cancel” button will return the user to the
summary data page with no changes made to the contracting party entry. Additional contracting parties may be added
to the collection box using the dropdown or “Add New Party” procedure. Contracting parties may be removed from the
collection box by highlighting and clicking on the left arrow.
3.1.5 Redacted Document Statement
The checkbox and
redaction statement located below the contracting party section and shown in
figure 16 is to be selected if all of the documents to be uploaded are fully
redacted and ready for the public to view.
Checking this box will allow all external website users to instantly
view any document that has been uploaded in association with this contract.
Figure
16. Redacted Document Statement
If the box is left
unchecked, the external website user will be given the option to request access
to the document. If a request is made
to view a non-redacted document, e-mail will be generated to the appropriate agency
containing the specific document(s) numbers requested. The agency has two business days after the
request to upload a fully redacted version of the document. If a fully redacted version is not uploaded
within the given time, the system will automatically make the non-redacted
version available for public viewing.
3.1.6 Redaction Screening
If the checkbox
associated with the statement “The following document(s) is/are redacted and
ready for public inspection” is checked by the agency user, the document upload
procedure will include a cursory screening for text patterns that may indicate
a need for further document redaction.
This screening cannot determine if further redaction is required,
only that some programmed text patterns have been detected during the
upload. These text patterns may or may
not require redaction.
For example, if during
the document upload and screening a number pattern that may indicate the
presence of a social security number is detected, the agency user receive the
message shown in figure 17:
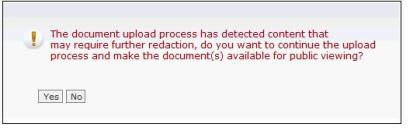
Figure
17. Further redaction may be required
message
The number pattern
detected may not actually be a social security number; it is up to the agency
user to determine if all necessary redaction has been accomplished prior to
upload. If the agency user clicks on
“Yes”, the process will continue, and the uploaded documents will be available
immediately for public viewing. If the
agency user clicks “No”, no documents are uploaded, and the user is returned to
the contract summary page.
The process used to attach
contract document files to the summary data is covered in the next section.
3.2 Contract File Upload
The system is designed to
accept the following four file types:
o
Microsoft Word
o
Microsoft Excel
o
PDF
o
TIFF
Contract documents are
uploaded using the “Select” button adjacent to the contract file box, as shown
in figure 18 below:
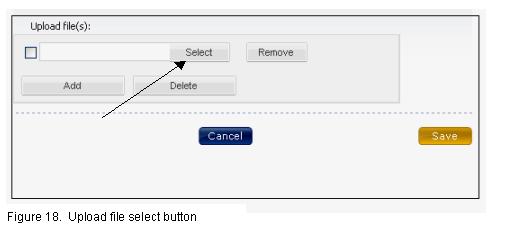
Clicking on the “Select”
button will bring up a “Choose File” pop up window as one would see with any
file upload procedure. From this
window, double-clicking on a file, or a single click followed by a click on the
“Open” button associated with the pop up window, will load the file into the
“Upload File” window.
The “Remove” button will
delete the file selected in that window.
If all required summary data is present, clicking on the “Save” button
will load the data to the system.
To add additional contract files, click on the “Add” button located below the upload file window, as shown in figure 19:
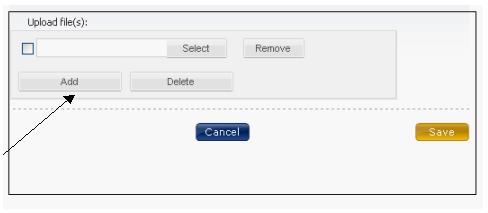
Figure 19:
Contract Add button
Clicking on “Add” will create
a new “Upload File” box; this box has the same functionality as the original
box. Each time the “Add” key is
clicked, a new “Upload File” box is created, as shown in figure 20 below.
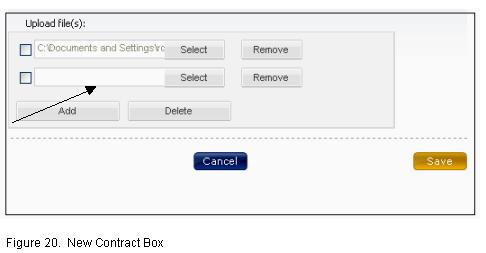
There is no limit to the
number of files you may upload for a contract.
Clicking on the “Save” button will initiate the process to upload the
contract summary data and contract files.
If the upload is
successful, the agency user will be shown the following message:
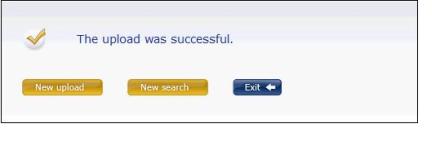
Figure
21. Successful upload message
If there was an error
during the upload process, the agency user will be shown the following message
(fig. 22):
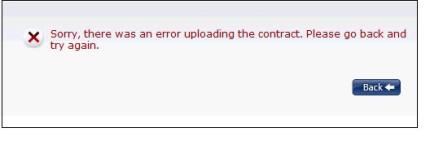
Figure
22. Upload error message
The agency user must use the “Back” button to return to the contract summary page and reattempt to load the contract data. This error may occur if the agency user attempts to load something other than a Microsoft Word, Microsoft Excel, PDF, or TIFF file.
4 Search for a Contract
The agency contract
search functionality is provided to facilitate adding amendments or POs to
contracts existing within the Treasury Right to Know document file system. This process will also be used by agencies
who have chosen to upload contract summary data via an FTP upload process, the
contract summary data may be retrieved with the search functionality; a
contract file would then be attached.
4.1 Accessing the Search Page
The process begins by
clicking the “Search for a Contract (to attach and amendment or PO)” link on
the control panel page (fig. 23):
This will bring up the
“Contract Search” page. The agency user
has the same search functionality as the external user:
4.2 Contract Search Functionality
The contract search page
is shown below (fig 24):

Figure
24. Contract Search Page
There are essentially two
separate searches: a keyword search, and a “Search Using Other Terms.” The two search types are not integrated in
this version of the system. We will
divide the use of this page into three sections for our discussion.
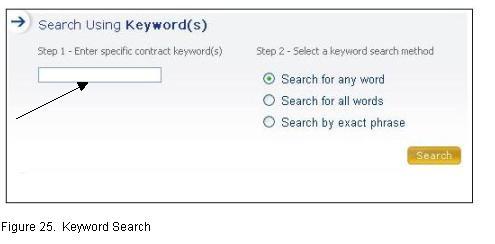
4.2.1 Keyword Search
The agency user can enter
one or more words into the keyword textbox for search (fig.25). The radio buttons associated with step two
of the process may further refine the search functionality. The “Search on any word” will retrieve all
documents that contain at least one of the entered words. The “Search on all words” will retrieve only
those documents that contain all of the entered words, and the “Search by Exact
Phrase” will retrieve only those documents that contain the phrase entered. Reset will delete all entries. Clicking on the “Search” button will
initiate the search function.
4.2.2 Advanced Search
The advanced search
feature gives the agency user much more search capability. The summary and date elements listed within
the advanced search section may be used individually or in combination to
further narrow the search results. The
date ranges or “search within last x
days” are available for all three contract date types.
4.2.2.1 Search by Contracting Party and/or
Agency
These two search
functionalities are dropdowns of all agencies and contracting parties listed in
the database. You may only search on
only one agency and/or one contracting party at a time. If you begin to type a known agency or
contracting party in the textbox, the system will auto-fill the textbox with
any matches it finds within the lists.
4.2.2.2 Search by Amount of Contract
The “Amount of Contract”
search is a dropdown of contract dollar value ranges. You may only select one at a time for a search. A search with a contract amount of exactly
$100,000 will work with either the $50,000 to $100,000 range, or the $100,000
to $500,000 range. The available ranges
are shown below (fig. 26):
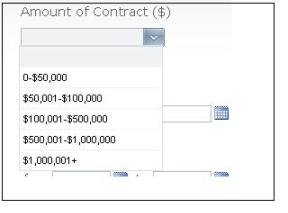
Figure
26. Amount of Contract
4.3 Search Results
An example of a search
results page is shown below (fig. 27):
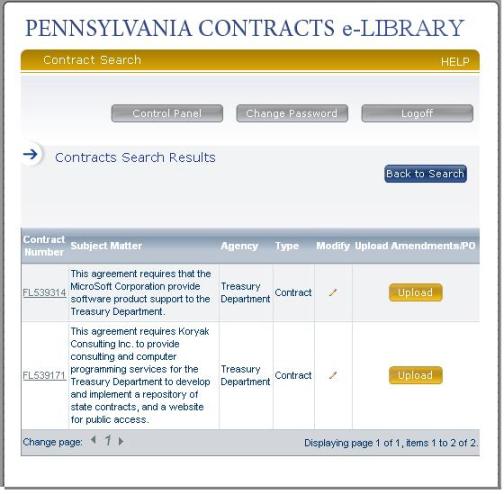
Figure
27. Search Results Page
The results include
contract number, subject matter, agency, type of document, modify, and the
“Upload” button. Both the contract
number and the modify “pencil” symbol are links to the original document
summary page. The “Upload” button will
bring up a page which will facilitate the linking of an amendment or PO to the
original contract. The results will
paginate after ten returns.
4.4 Amendment or PO Upload Procedures
4.4.1 Accessing the Upload page
The upload process for
both amendments and POs is essentially the same. By clicking on the “Upload” button on the search results page,
the following summary page is shown (fig. 28):
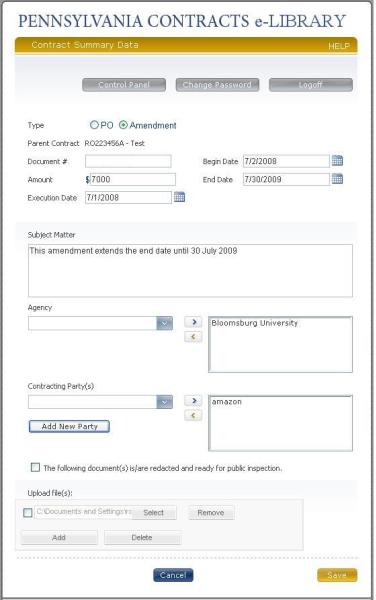
Figure
28. Upload Page
Notice that this summary
page is very similar to a contract summary page; however, there are a few
important differences (fig. 29).
Figure
29. Upload Detail
There are now radio
buttons to select either an amendment or PO document type. The Parent Contract number and subject
matter are displayed. The contract
number is blank: the agency user must
input a unique number for amendments and POs in this text box. All other summary data elements returned
automatically contain the parent contract values. These are all modifiable by the agency user depending on any
changes that an amendment of PO may make to the parent contract.
4.4.2 Amendment or PO document Upload
The procedures for
amendment of PO document upload are the same as contract upload
procedures. Once amendments or purchase
orders are tied to a contract, the document relationship will be shown at the
bottom of the document summary page as a “tree structure”, shown here (fig.
30):
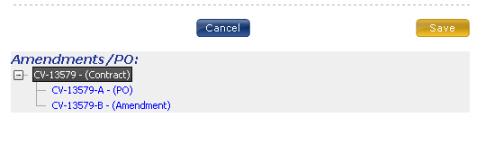
Figure
30. Document tree detail
The document numbers
within this hierarchy are links to their respective summary data pages.
4.5 Contract Upload for Previously FTP’d Summary Data
If the agency utilizes an
FTP process to upload summary data, the contract file(s) must subsequently be
manually uploaded. This may be
accomplished by clicking on the “Search for a Contract” link on the Control Panel
page, searching for the summary date using the contract number or other means,
clicking on either the contract number or modify link on the search results
line for that contract, and uploading the contract files using the “Select”,
“Add”, and “Save” button functionality as described in section 5.2.
4.6 Upload of Redacted Document Version
If an agency receives a
request to upload a redacted version of a document currently maintained with
the system in a non-redacted form, the agency user may perform a search on the
contract, click the modify link on the specific contract within the search
results table, and upload the redacted version of the document per the
description in section 5.2 of this document.
This will not entail any reloading of summary data. Once a redacted version of a requested
document is uploaded, a link to a PDF version of that document will be
immediately available for public view.